

Hey guys what is up? Hair tutorial! Lately I’ve been loving this whole Bantu knots trend going on and decided to try it out myself. I actually loved the look on me but kid of felt a little extra weary because I was scared of what people would say. But aside from the occasional eyes no one said a thing(well maybe because I was staring daggers at anyone who dared look at me weirdly) So today I’ll be showing you guys how I do my Bantu knots.
I feel like this hairstyle is more appropriate with a suitable outfit. You know like rock it from head to toe and make sure you’re slaying from top to bottom. Also the right attitude will rock this outfit too.
What you’ll need.
1. Some hair moisturizer.
I for this tutorial did use my Dark and Lovely Anti Breakage Oil Moiusturiser because my hair was relaxed and with all the twisting I didn’t want it to break.

2. Hair Dryer.
No you don’t need a big ass powerful hair dryer just something so that you can blow out your hair and space it out. I’m just using mine from Essential that I bought from Shoprite ages ago.

3. A toothbrush.
Lol someone should create a little brush for hair because almost everyone is using their old toothbrushes for their heads. You just need a basic old toothbrush so that you can sort out your baby hairs.

4. A fork comb with wide teeth and a thin comb that has a parting line(lol not sure what the name is).
This is just so that you can comb out your hair and make some parts.

Steps.
* Firstly you’re going to moisturize your hair making sure that your scalp is also Moisturised.
* Then you’re going to blow dry you hair to just give it some volume and make it easy for you to open parts. Make sure that the moisturizer is deep in the hair and that your hair is dry for easier control.
* Then you’re going to comb all your hair back. You’re going to use the fork comb to comb your hair in all directions until it’s at the back of your head. Making sure there’s no knots or anything like that.

* With your hair lying back you’re going to start making square parts. Depending on where you want your part, start there and just part your hair into squares. Do one at a time.

* From the square of hair you already have parted. Part that into 2. So that you have 2 small pieces.

* Then you’re going to take the 2 small pieces and do a twist braid. [i don’t know how to explain how to do a twist braid but simply just twist them around each other]

* With the twist braid then you’re going to twist that as one alone until it looks like a dread. Then just curl it into a small ball and each time you round it put the braid underneath as if you’re tucking it in.
* And that’s basically it! Just repeat each step until you have your whole head done.
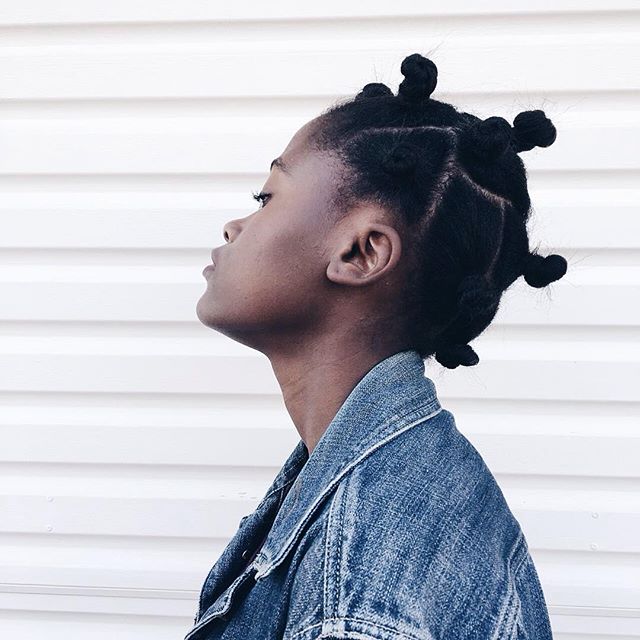
Yup guys so that is my tutorial on how to do bantu knots. I hope that you enjoyed reading this post and thanks a lot for reading.
I recently just saw a post on OlWomen on Bantu Knots and the different types of them . And I’d like for you guys to go and check the post out here because its really such an interesting post and i’m sure you will learn a thing or two.
QOTD : WHAT IS YOUR GO TO HAIRSTYLE?
Instagram x theeoriginaljay
Twitter x theeoriginaljay
Snapchat x theeoriginaljay
Email x journeyspeaksblog101@gmail.com


This is really good. Thanks for putting this up. 👏
LikeLiked by 1 person
Thank you a lot!
LikeLiked by 1 person